Winter Photography Tips: Part 1

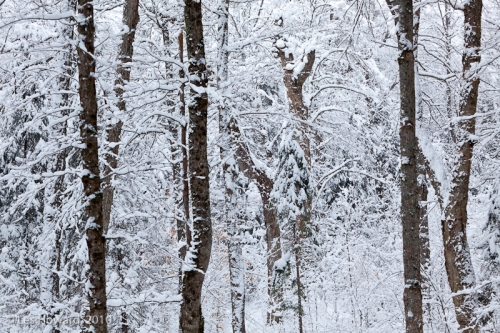
Winter, Algonquin (December 2010)

Winter, Algonquin (December 2010)

It’s December. The leaves have fallen and the trees are bare. Here in the southern Ontario snowbelt we had several early dustings of snow but they all soon melted off. Although our first major snowfall was late this year, it’s now here to stay and we will not see the grass again until at least March, maybe April. The Friends of Algonquin started their Facebook album of 2010 winter photography a month ago on November 5. Algonquin Park, about a two hour drive north of here, is my favorite photography destination even in winter. I took my first winter trip there on December 4-5 this year.

I’m often asked for advice about photographing in winter so I thought I’d share some of my favorite tips in a series of articles. Here are a few to get you started. If you have a specific question about winter photography you’d like answered, ask in the comment section.

Condensation

This is so important I’ve listed it first. Condensation can disable a camera or lens for hours. It occurs when warm, humid or moisture laden air meets a cold surface. Like when you breath on a cold window and it fogs up. The fog might stay there for hours or even freeze into ice like on your car windshield. You don’t want that to happen to your camera and lens especially on the inside where you might not be able to see it or do anything about it.

So don’t breath on your lens or camera if you can avoid it. And don’t try to blow snowflakes off the front of your lens; use a lens brush or Rocket Blower.

Some people advocate putting their equipment in a sealed plastic bag before bringing it back into a warm building but I simply put everything in my camera case and zip it up. I leave it closed for several hours or even overnight until everything warms up to room temperature. Before sealing the camera bag, I take out all the batteries so they can be recharged and also the memory cards so they can be warmed up and off-loaded to my computer.

I often put my camera bag over a heater vent to speed up the warming process. If I decide to go back outside I either leave the bag outside so it stays cold or simply take it back out without opening it inside.

Batteries

Even before the temperature gets down to the freezing mark, you will start to experience problems with batteries. The colder your batteries get, the faster the power will drain. There are several ways to handle this problem. I like to carry a couple of fully charged backup batteries in a nice warm pocket inside my coat. As soon as the battery in the camera starts to give me any problems. I replace it with a warm one and put the used one in my pocket to warm back up so I can reuse it later.

You can extend the battery life by cutting down on your power consumption. The LCD uses a lot of power so keep the display turned off when you don’t need it. Don’t use Live View if you don’t need it. The same goes for Image Stabilization. Those of us with failing eyesight love Autofocus but it, too, can use a lot of power. I use the center spot to focus a scene then turn AF off when I recompose moving my subject off the spot. This may require a tripod.

At the end of the shooting day, I take all the batteries inside and fully recharge them so they’ll be ready for the next day. I keep a power inverter in my car so I can partially recharge them when I’m driving from one location to another. The inverter only works when the engine is running so this is not very effective if you’re only going short distances. I purchased the inverter from the computer department at Staples.

Tripods

Metal tripods get cold. They can be painful to touch with bare skin. I wrap my tripod legs in ensolite foam pipe insulation that I purchased from Home Depot and Lowe’s. This insulation comes in various diameters so you need to take your tripod into the store to find the size that fits. I cut the insulation to length using a box cutter type knife, put it on the top section of the tripod legs then wrap it end to end using black vinyl electrical tape. I leave it on my tripod year round because it also cushions my shoulder when I carry it. The insulation will last for many years without needing to be replaced. Also, it does not add any significant weight to the tripod.

Niagara Butterfly Conservatory

Butterfly, ambient light.

Last week my friend, John, invited me on a field trip to the Niagara Butterfly Conservatory (NBC) in Niagara Falls, Ontario. John goes down there several times a year to try out new equipment and techniques. All the staff seem to know him. I hadn’t been to the NBC in a couple of years and I thought that the warm humid atmosphere would be a pleasant change from winter. So armed with several cups of coffee each we hopped in his car and drove down. We arrived at 10:00 am Sunday morning when it opened. That seems to be a good time because we had the place to ourselves for a couple of hours before many tourists started arriving.

Butterflies make interesting photo subjects. Even the ones that look drab when seen at a distance become colorful when viewed up close through a macro lens. All the flowers, leaves and branches they land on can also be used as strong visual supporting elements to create effective compositions.

One of the challenges of photographing butterflies in the wild is getting them to stay in one place long enough. At the NBC they are conditioned to people being around and don’t flit away when you approach. They will often land on an outstretched hand. I had one on top of my head for a few minutes. They are also plentiful so you will have no problem finding a willing subject.

(Click on image to enlarge) Butterfly, flash.

John and I each chose different camera equipment setups for the day. He used a Canon 7D with a 100-400mm f/4L lens and extension tubes plus a macro ring flash all mounted on a monopod. I had a Canon 70-200 f/4L (non-IS) lens mounted on my 5D2 and a tripod. I put on a full set of Kenko extension tubes but eventually settled on using only the 36mm tube. That allowed me to get close enough to fill the frame but I still had plenty of working distance. I shot for awhile using natural light then put on my Canon 580EX2 flash to try it out. I should note that none of the pictures accompanying this article have been cropped.

Although they have a rule against using tripods, they don’t enforce it until there are other people around and you start getting in their way. I was able to use my tripod until about noon. They were very pleasant about it and allowed me to keep using it as long as the legs were closed. John’s monopod was not a problem.

The first butterfly conservatory I visited, about 20 years ago, was Butterfly World near Fort Lauderdale, Florida. It is much larger than the NBC. John has also visited the Cambridge Butterfly Conservatory, formerly known as Wings of Paradise, which might be of interest to those located in Toronto or southwestern Ontario. I also know of several others in both Canada and the US. If you are looking for a challenging subject, you might want to visit one. It’s also a good place for a family outing with lots to see and do for the kids and non-photographers.

(Click on image to enlarge) Butterfly pair, ambient light.

Depth of Focus in Landscapes

One of my biggest challenges in landscape photography has been getting sufficient depth of focus from the closest foreground to the furthest background elements, usually, but not always, the horizon.

Using the movements available on 4×5 and other large format cameras, you can control the plane of sharp focus to get your entire image sharp from near to far. Unfortunately large format digital cameras are out of my price range. These kinds of techniques are also now available in the new tilt-shift lenses from both Canon and Nikon. Tilt-shift lenses are expensive, heavy and big so I don’t see myself carrying them on a hike or canoe trip.

An August 31, 2010 article in Outdoor Photographer, Control Your Depth of Field by Willard Clay, describes a how to combine focus slices (multiple exposures of a scene focused at different points) using the Photoshop layers Auto-Align feature. You can read the article yourself and look at the examples to see how it works so I won’t repeat Clay’s explanation here.

I have not tried the technique but I’d be interested in hearing feedback from anyone who has including actual before and after samples. On the surface, it seems simple and should work quite nicely. But there appear to be two major drawbacks to using it. First, it won’t work very well for moving subjects. Second, it looks time-consuming, something you would not want to do for a lot of pictures.

That second issue is a biggie for me. I prefer to capture my pictures in-camera whenever possible so I don’t need to spend a lot of time reworking them in Photoshop in order to fix problems. I’d rather be out making more pictures than slaving over a computer screen!

Freeman Patterson

CBC Radio broadcast a 54 minute interview with Freeman Patterson on October 13, 2010. I recommend setting aside an hour to click on the link and listen to that interview. Whether you are a professional photographer, an experienced amateur or just starting out with your first point and shoot, there is something in it for you.

I first met Freeman when I heard him speak and show some of his outstanding photographs at a Toronto Camera Club lecture in 1971. I was just a beginning photographer who had recently abandoned my 16 year old Brownie Hawkeye for a brand new Nikkormat FTn with a removable 50mm f/2 lens and still had not figured out what all those dials with the mysterious numbers were used for. More than talking about the nuts and bolts of photography, though, Freeman talked about his philosophical approach. That spoke to me. I’ve since met Freeman several more times, most recently in April, 2004 in Burlington, Ontario when he gave an all-day seminar on Visual Design. Each time, I’m reminded that the camera sees both ways, out into the world and back into your soul.

Freeman has written several books that I highly recommend:

  1. Photography for the Joy if it;
  2. Photography and the Art of Seeing;
  3. Photography of Natural Things;
  4. Photographing the World Around You (A Visual Design Workshop);
  5. Photo Impressionism and the Subjective Image (with André Gallant);

in addition to several collections of his work in both Canada and Africa. As technology has evolved, Freeman has revised his books and so most are now  available in revised second and third editions. I recommend reading them in the order I listed them since each builds on material presented in previous books. All are available on Amazon.com where you can also check out the contents and read a bit of the first chapter. However, I recommend you support the author by buying directly from his website.

Freeman has given photography workshops at his home in Shamper’s Bluff, New Brunswick for many years.  I have never been fortunate enough to go but several friends experienced a transformation in their photographs after attending. Both his workshop and seminar schedules are published on his website.

Freeman Patterson is an icon of Canadian photography.

The Northern Lights

The northern lights, also known as the aurora borealis, are one of nature’s most spectacular sights.

I live near Toronto, Ontario, too far south to see them especially when the sky is constantly lit up by the lights of the city reflecting off the upper atmosphere.

In over 40 years of photography outings, several times a year, to Algonquin Park a couple of hundred miles north of here, I have been lucky enough to see the northern lights twice. The first time was in 1971 when I was camped on the south shore of Tea Lake. We were treated to a late night show of dancing blue and white light high in a black star-studded northern sky. The second time was in the mid 90s. I was on the south beach of Canisbay Lake when they appeared over the northern shore. The green and yellow flames didn’t reach very high but they seemed to stretch out from one end of the horizon to the other. Unfortunately I have no successful photographs of either occurrence. That was when I still used film. Today, with the instant feedback of digital technology, I’d be much more likely to have some photos to show you.

Only twice? Most people I know have never seen them and never will. My son worked in Algonquin as a canoe tripping guide for several years and he has never seen them. Nor have many other friends who also work there.

I was very excited when I heard about this new website from the Canadian Space Agency in cooperation with the University of Calgary and Astronomy North. It went live yesterday, Septmber 20, 2010. They have set up a system to broadcast live pictures of the northern lights over the internet from Yellowknife NWT. You will need to select ‘Connect’ in order to view the show. It operates as an ongoing series of still photographs that updates every 10 seconds. The website also includes some educational information and a gallery of interesting past shows that you can view. The past shows appear as a movie since there is no need to wait for the 10 second updates.

Another feature is a Twitter account you can follow that will deliver notices of when you can expect the northern lights to be active. This would be useful if you happen to live in the north where you are more likely to be able to see them. Probably less useful to those of us in the south.

This new website is designed to bring the movie version of one of nature’s wonders, the northern lights, to many of us who will never have the opportunity to see the live show. Check it out.